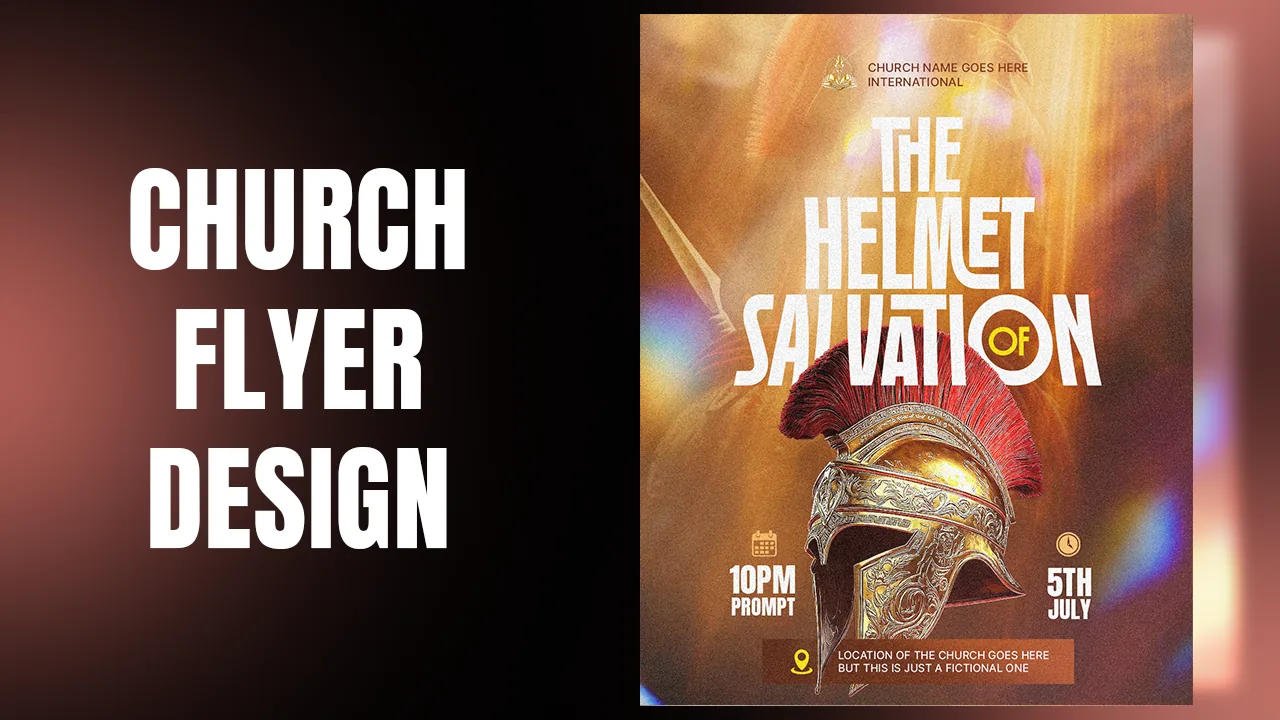
In this tutorial you will design a church flyer, "The Great Harvest", in Affinity (the free Affinity by Canva app). A man in a white robe holds a sickle above a golden wheat field, under a tall, elegant serif title on a deep teal sky.
You will learn how to build a sky from two photos with masks, blend a wheat field into it, cut out part of an object with the Freehand Selection tool, tuck a wheat stalk through the curve of the sickle, add depth with blurred wheat in front, and finish with a warm glow, a light flare and light leaks. Each step links to the exact moment in the video, so press Watch at whenever you want to see it done.
What you will make

What you need
- Affinity by Canva (Pixel studio), which is free
- The resource pack: the teal mountain sky, the green hills, the wheat field, the man with the sickle, the wheat stalk, the light flare and the light leaks
- The Achilo font for the title
- About 25 minutes
Get the resource pack from our Telegram channel before you start.
Open Affinity and create a new document. Set the units to Pixels, the size to 1080 × 1350 px and the DPI to 300. Make sure Transparent background is not ticked, then click Create document.
You will use the Character panel a lot. If you cannot see it, click the three dots in the top bar and go to Panels › Character.

Drag the teal mountain image from the resource folder onto the canvas and scale it up to fill the whole artboard. Zoom out and move it down a little.
Now drag the green hills image on top and scale it to fill the canvas too. You could use either image on its own as the background, but the hills have lovely warm light near the horizon and the teal image has the deep sky, so you will combine them.

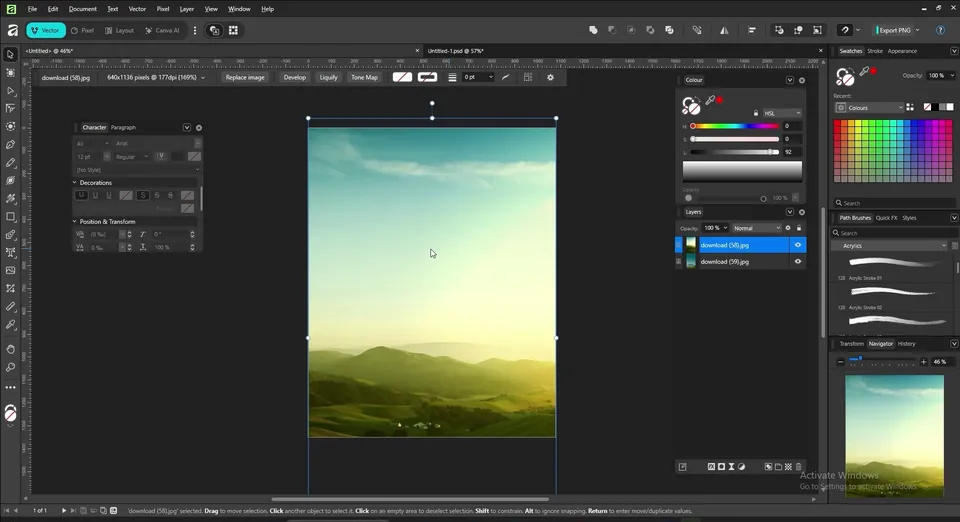
With the hills layer selected, click the mask button at the bottom of the Layers panel. To paint on a mask you need the Pixel studio, so switch to it in the top bar and press B for the brush.
The default brush is very hard. Open the Brushes panel, choose the Basic category and click a Round Light Brush. Use [ and ] to change its size, set the colour to black and keep the flow low. Paint over the top of the hills so the teal sky from the image below shows through, and keep the warm light near the horizon.
Tip: Before you brush a mask, check that the mask, not the image, is selected in the Layers panel. Otherwise you will paint black onto the photo.

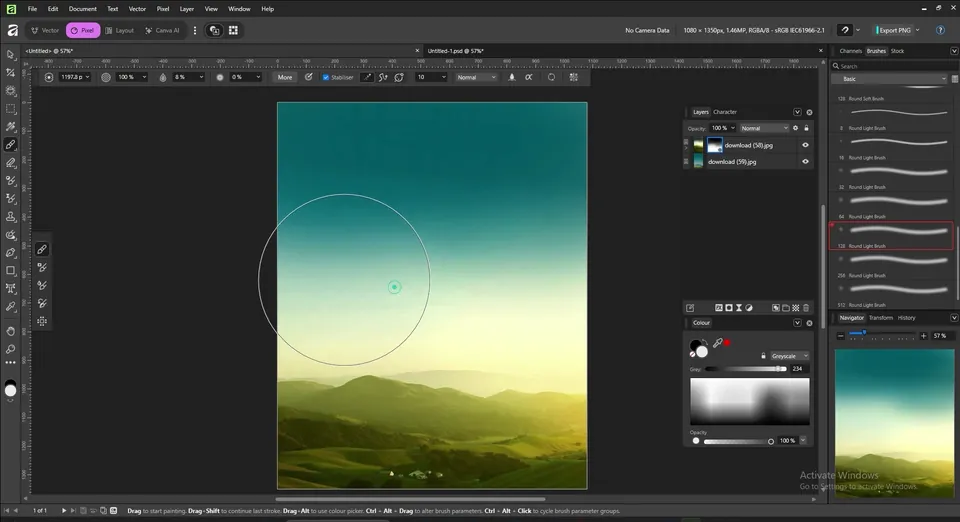
Select the top layer and drag in the wheat field image. Place it in the lower part of the canvas and scale it down a little if needed.
Add a mask to it, pick the brush again with black as the colour and a flow of about 8%. Paint over the blue sky to remove it. Then zoom in, make the brush smaller and paint over the blue gaps between the stalks. Do not try to select the grains one by one: just brush over the blue, and it is fine if you soften a few grain tips. Finally make the brush bigger and wipe gently over the tops of the wheat so they fade into the sky.
Tip: Very low flow lets you build the mask up slowly. Each pass removes a little more, so mistakes are easy to fix.


Create a new pixel layer. Double-click the colour swatch and enter F6FDD4, a pale cream yellow.
Take the brush, drop the flow to about 16% and dab a few times along the line where the wheat meets the sky, mostly at the edges. Toggle the layer off and on to compare before and after: the sky now glows behind the field.
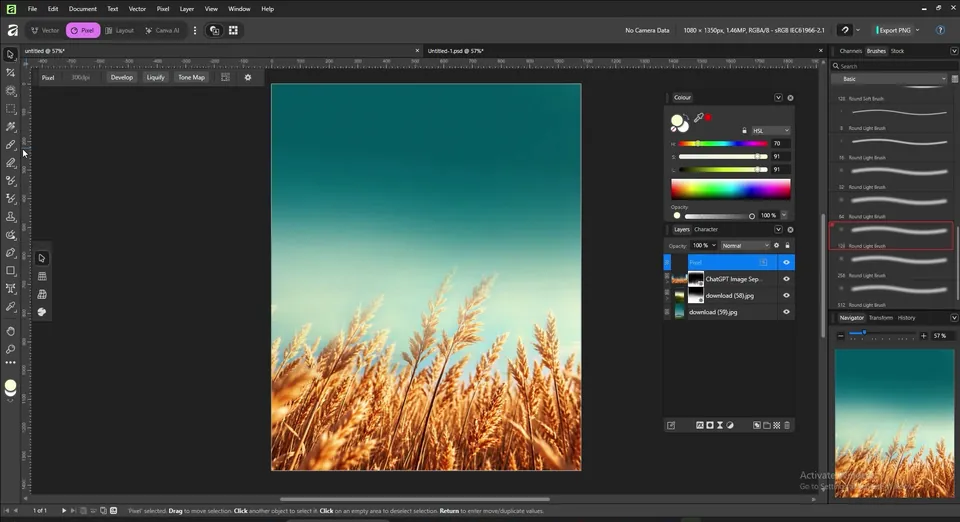
Select the wheat field layer. Click the Live Filters button at the bottom of the Layers panel and choose Blur › Gaussian Blur. A radius of about 0.4 px is enough to take the edge off the sharp stalks, so the man you add next stands out in front of them.
Because it is a live filter, you can double-click it in the Layers panel later to change the amount.

Drag the man with the sickle from the resource folder and make sure it is the top layer. Scale it so he stands in the middle, with his feet in the wheat.
Do not make him too big, or you will lose the space at the top that the title needs. Centre him on the page.

The plan is to make wheat pass through the curve of the sickle. For that you need a copy of the blade on its own layer. Press M for the selection tools, right-click the tool in the toolbar and pick the Freehand Selection tool. In the context toolbar set the Type to Polygonal.
Zoom in and click along the edge of the blade, moving a short distance between clicks. Select only the part of the blade where the wheat will cross. If you need to move around while selecting, hold Space and drag. Click your starting point to close the selection, press Ctrl+J to copy it to a new layer, then Ctrl+D to deselect.


Drag the wheat stalk image in, scale it down and rotate it so it sits in the curve of the sickle, and move it just above the blade copy in the Layers panel.
Hold Ctrl and click the thumbnail of the blade layer to load its shape as a selection. Select the wheat layer and add a mask. The mask now shows the wheat only inside the blade, which is the opposite of what you want, so press Shift+Ctrl+I to invert it. Press Ctrl+D to deselect.
Now take the brush with white and paint on the mask over one side of the blade only. That side of the wheat comes back in front, while the other side stays behind the blade, so the stalk looks like it passes through the sickle.
Tip: If too much wheat disappears, paint white on the mask; if too much shows over the blade, paint black.


Bring the same wheat stalk in again, make it smaller and rotate it. Press Ctrl+J to duplicate it, then right-click and choose Transform › Flip Horizontal. Scale it down and push it to the side.
Duplicate once more, make this copy bigger and move it to the top of the layer stack so it sits in front of the blade. Add a Gaussian Blur live filter of about 0.5 px. Duplicate it, scale it up, rotate it and place it at the edge. Double-click its Gaussian Blur and raise it to about 4.5 px. The big, blurry stalks feel close to the camera and give the photo depth.
Tip: Blur the biggest stalks the most. The more blur, the closer to the camera they feel.


Pick the Artistic Text tool, click and drag on the canvas, and type GREAT and HARVEST on two lines.
In the Character panel, search for the font Achilo. Hover over the leading value and scroll to tighten it a little so the two lines sit close together. Then open the Paragraph panel (three dots › Panels › Paragraph) and set the text to centre.

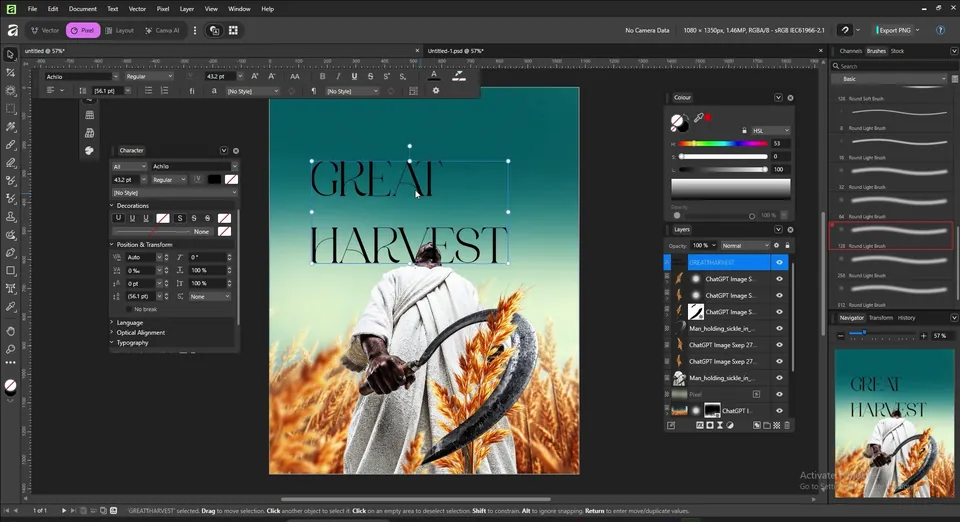
Go to View › Margins and Guides and switch the units to percent. Add a vertical guide at 14% and another at 86%, so there is the same space on each side.
Select the text with the text tool and scroll over the font size in the Character panel until the title reaches both guides. Set the colour to white.

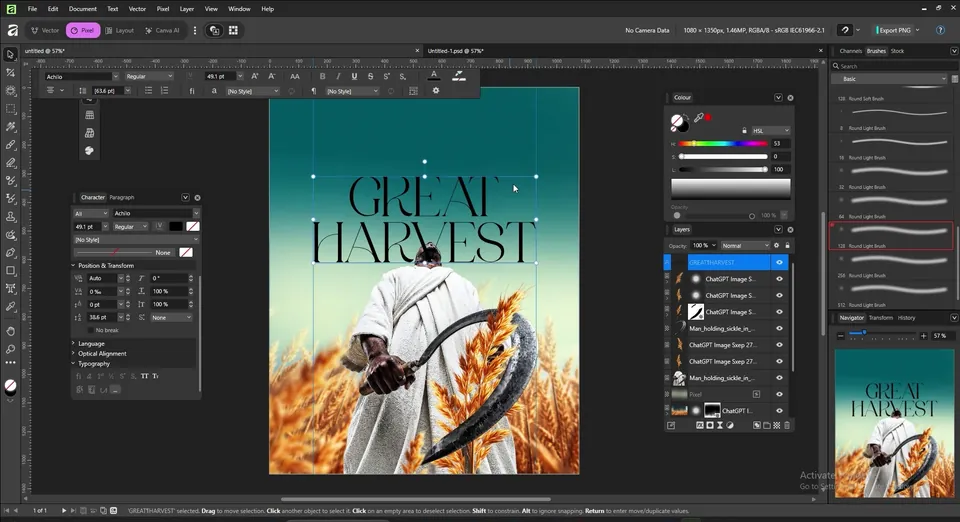
In the Layers panel, drag the title layer down so it sits just below the man. His head now overlaps the letters, which makes the design feel layered. Move the title so the head covers part of HARVEST.
This happens quickly in the video: hold Alt and drag the title to make a copy, type THE in it, then scale it down and place it centred above GREAT.


Select the top layer, create a new pixel layer and set its blend mode to Add.
Press I for the colour picker and click on the warm browns in the wheat. Switch back to the brush, make it big and set the flow to about 52%. Click once on each side of the wheat to brighten it, as if sunlight is coming from behind. Toggle the layer off and on to see the difference.
Tip: If the Add layer looks too strong, lower its opacity instead of painting again.

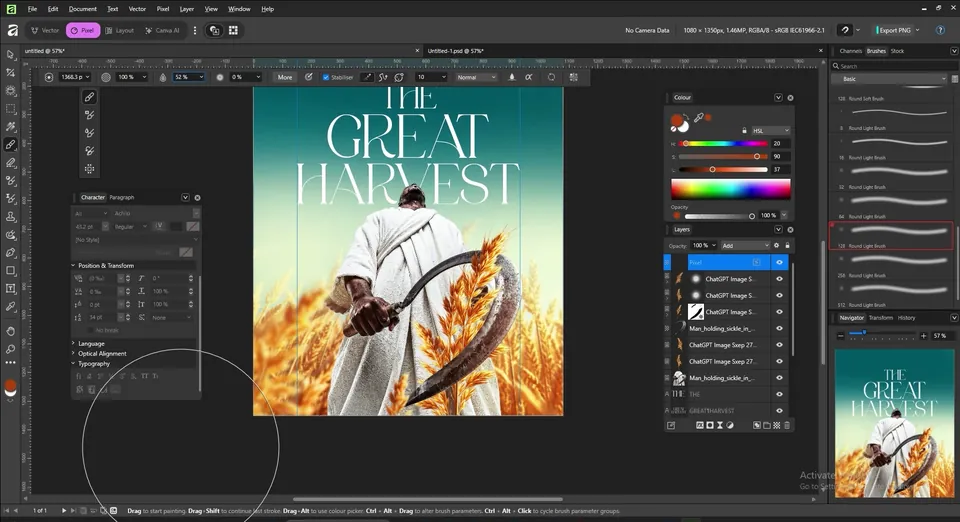
Create another new layer above the glow, take the brush with black and click once where the design needs a little shadow. One click is enough.
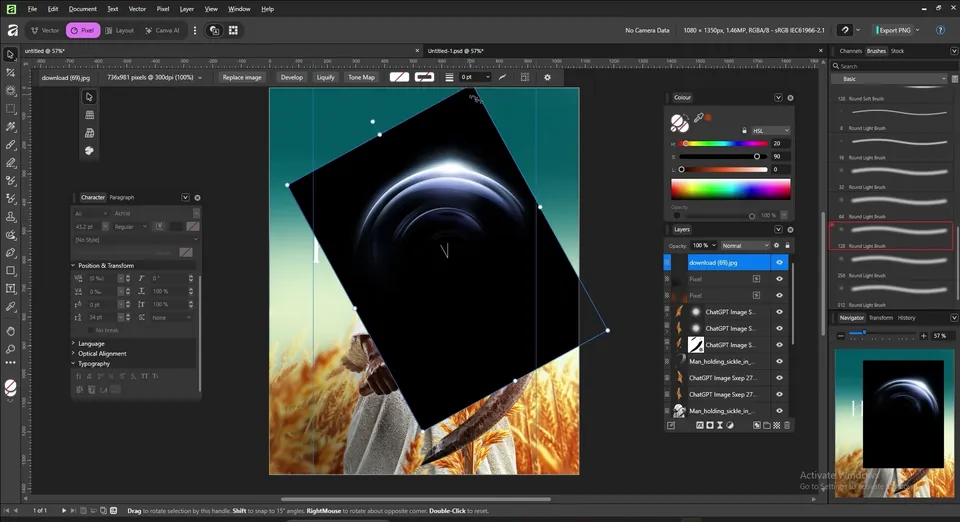
Then drag the light flare image from the resources onto the canvas. Rotate it, scale it down and set its blend mode to Screen so the black disappears. Place the glow on top of his head, like light shining down on him.

The video skips the small text, but you can see it on screen: the church logo and name at the top, the date and time (SUN 5TH APR, 2PM GMT) on the bottom left and the venue under it, all in white.
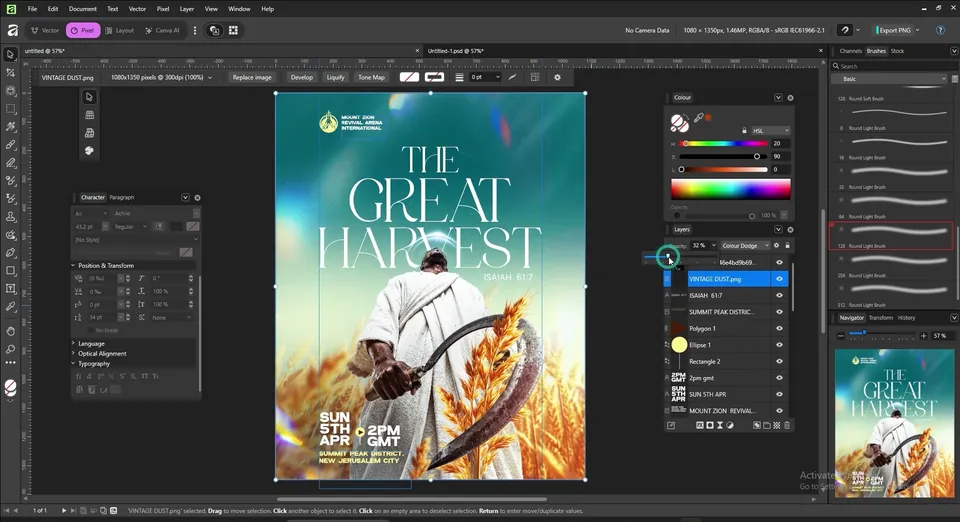
Select the top layer and drag in the first light leak. Set its blend mode to Color Dodge. Then add the second light leak, scale it to fill the whole canvas, set it to Screen and lower its opacity until the colours feel soft.

Key takeaways
- Combine two background photos with a mask to get the sky of one and the warm horizon of the other.
- Use a Round Light Brush at low flow to blend photos and to paint a soft glow on the horizon.
- Copy part of an object to a new layer, load it as a selection with Ctrl-click, then mask other elements in front of it or behind it.
- Blurred elements in front of the subject add depth, and live filters let you change the blur later.
- Finish with a glow layer on Add, a light flare on Screen and light leaks on Color Dodge and Screen.