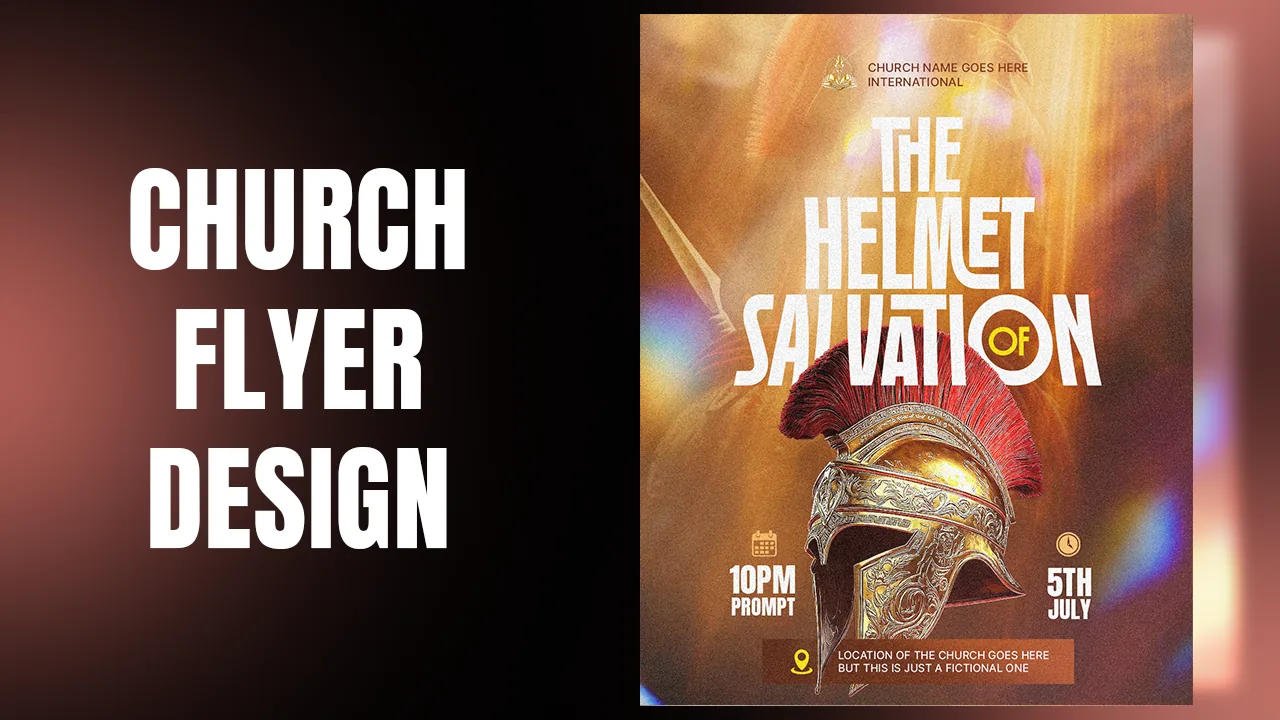
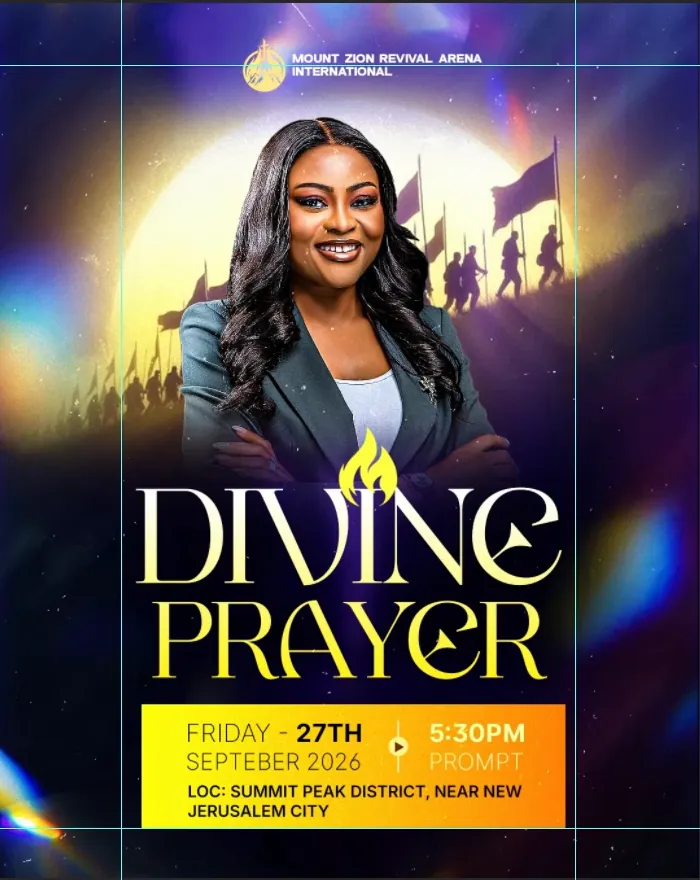
In this tutorial you will design a church event flyer, "Divine Prayer", in PhotoCraft, the free image editor from the ArtCraft suite. If you know Photoshop, you will feel at home: the layers, blend modes, masks, layer styles and most shortcuts work the same way.
You will build the flyer in layers: a gradient background, a blurred photo for texture, a glowing sky, light leaks and dust, the guest, a gold title, a flame icon and an information box. Each step links to the exact moment in the video, so press Watch at whenever you want to see it done.
What you will make
What you need
- PhotoCraft, installed from the free ArtCraft launcher
- The images from the resource pack: city photo, glowing sky, light leaks, vintage dust, the guest photo and the flame icon
- About 25 to 30 minutes
- No Photoshop experience needed, although it helps
Get the images from our Telegram channel before you start.
Search for getartcraft and open the /apps page, titled "Crafting apps". Click Download launcher, run the installer and click through Next and Install.
The launcher lists every app in the suite: PhotoCraft (like Photoshop), VectorCraft (like Illustrator), FilmCraft, LightCraft, EffectCraft and more. Click Install under PhotoCraft, then Open. You can install VectorCraft now too; it is used in the logo design tutorial.


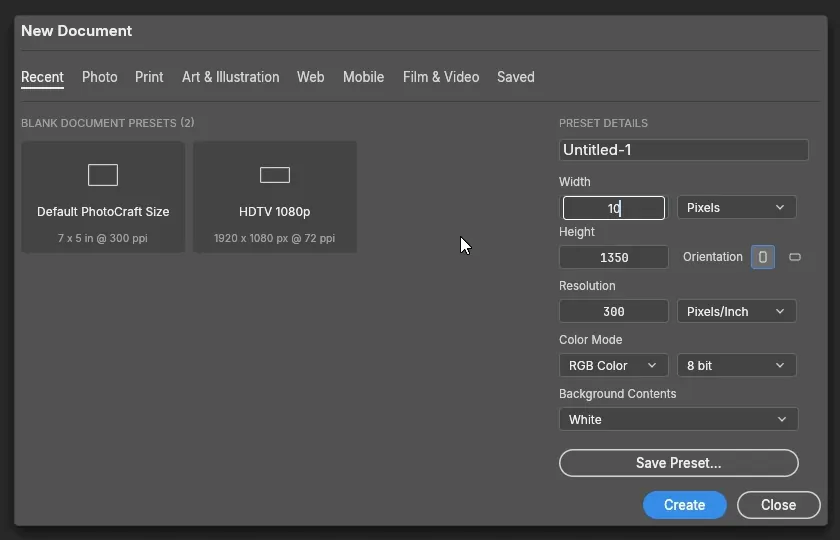
Go to File › New. The New Document window looks just like Photoshop's, with tabs for Photo, Print, Web, Mobile and more.
Set the units to Pixels, the width to 1080 and the height to 1350. That is the 4:5 portrait size that fills the screen on Instagram. Use a resolution of 300 pixels/inch (72 is fine if you only post online), leave the background white and click Create.
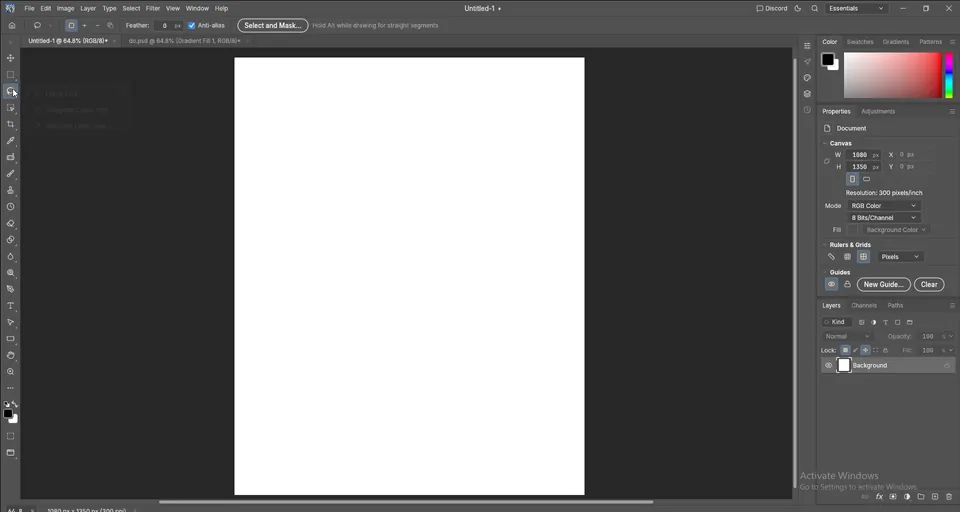
The tools are on the left, in the same order as Photoshop: Move, Rectangular Marquee, Lasso, Polygonal and Magnetic Lasso, Object Selection and so on. On the right you have the Properties, Layers, Channels and Paths panels, plus workspaces such as Photography and Painting.
The Filter menu has Filter Gallery, Camera Raw, Adaptive Wide Angle, Lens Correction, Liquify and the blurs, and the Select menu has Inverse and the other commands you know. The shortcuts are the same as well.
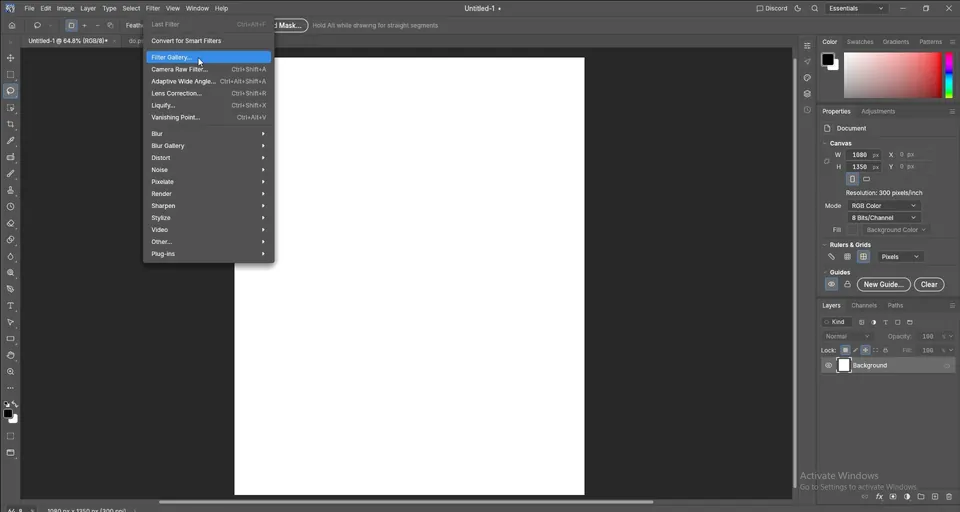
At the bottom of the Layers panel, click the adjustment layer button. The first two options are Solid Color and Gradient; choose Gradient.
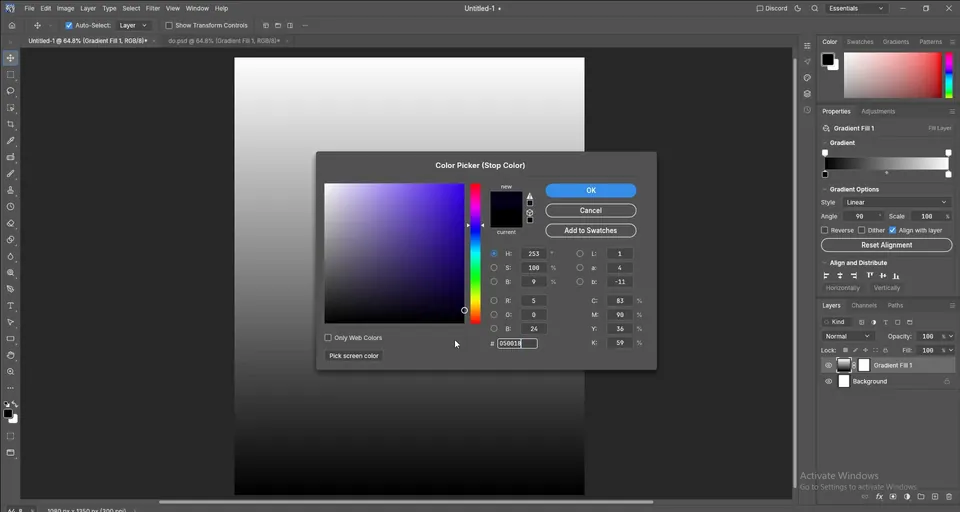
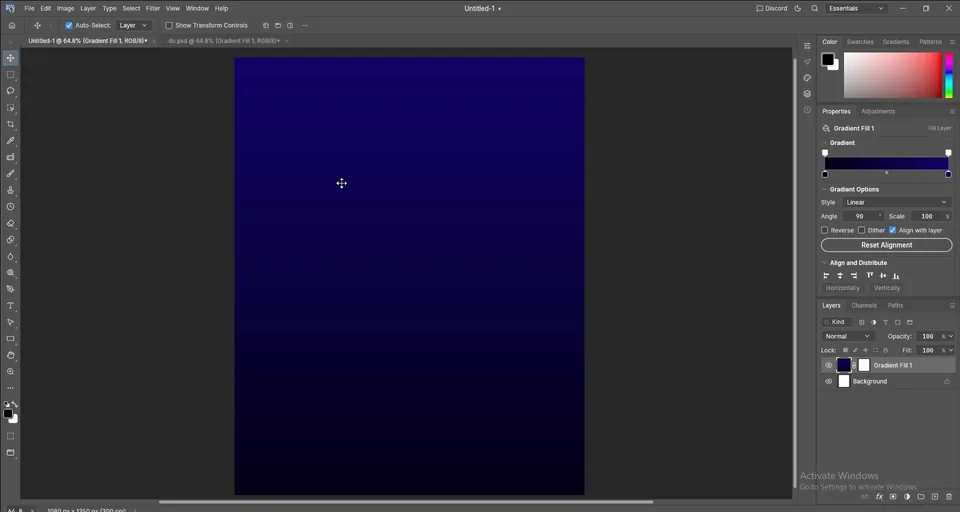
Click the gradient layer's thumbnail (not its mask) so the gradient options open in the Properties panel. Double-click each color stop and type a color: a very dark navy such as #050018 for one stop and a deep blue for the other. This dark blue base is what makes the glow and the gold title stand out later.
Tip: Click the gradient layer's thumbnail, not the mask next to it. If the mask is selected, the gradient options do not appear in Properties.
Drag the city photo from the resource folder onto the canvas. Scale it to cover the whole canvas, then press Enter or click the check mark to accept.
Go to Filter › Blur › Gaussian Blur, set the radius to 280 px and click OK. Then change the layer's blend mode to Soft Light. The photo turns into soft streaks of light and shadow that give the background depth.

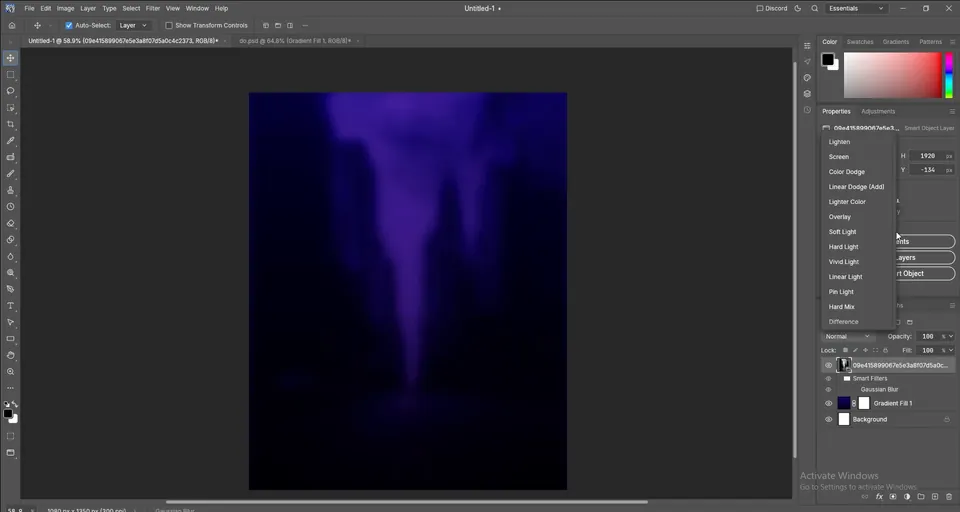
Bring in the glowing sky image with the marching figures. Make it fill the canvas and drag it up a little, then set its blend mode to Screen so the dark parts disappear and only the light stays.
Click Add layer mask at the bottom of the Layers panel. Pick the Brush (B), right-click and choose a soft round brush, and set the foreground color to black. Lower the Flow to about 30% and paint over the hard bottom edge so it fades into the background.
Tip: Use the square bracket keys to change the brush size: [ makes it smaller and ] makes it bigger, just like in Photoshop.


Drag in the light leak image, scale it to fit and press Enter. Set its blend mode to Screen; the black disappears and only the colorful flares stay at the edges.
Next, bring in the vintage dust texture and set it to Color Dodge. It adds fine grain and sparkle over the whole flyer.

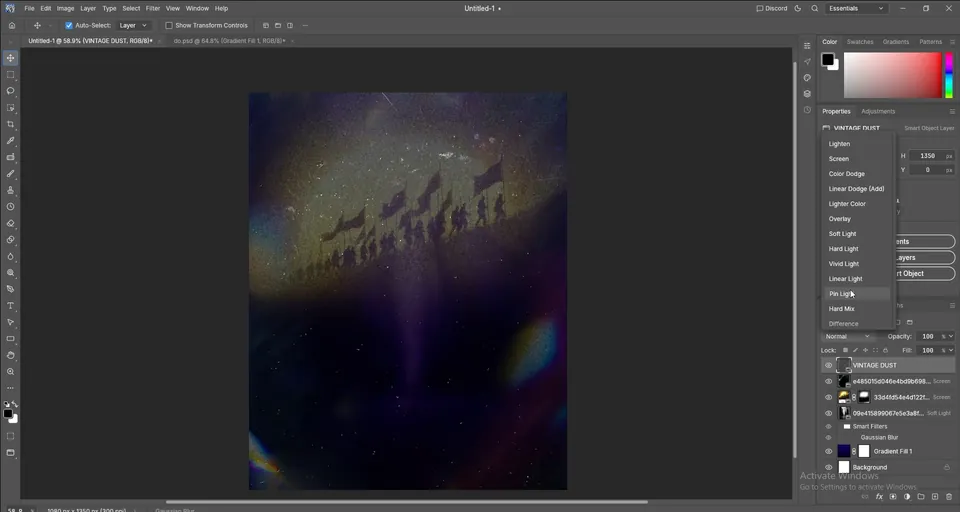
Select the vintage dust layer and click Lock all in the Layers panel, then do the same for the light leak. Now you cannot move them by accident while you work on the top of the flyer.
Go to View › New Guide Layout. Set columns, gutter and rows to 0 and the Margin to 190 px, then click OK. The guides mark a safe area, so your text and the date box line up and stay away from the edges. PhotoCraft has no live preview in this window yet, so check the result after you click OK.
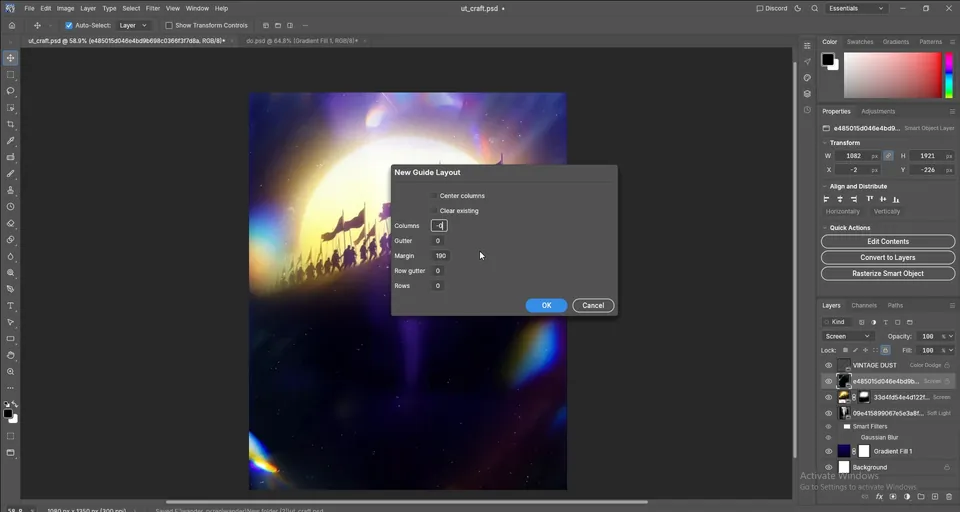
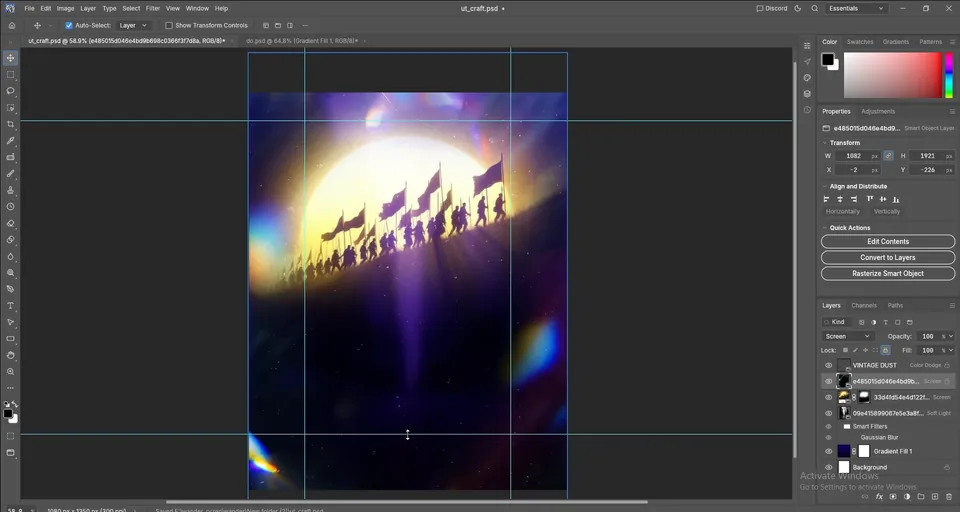
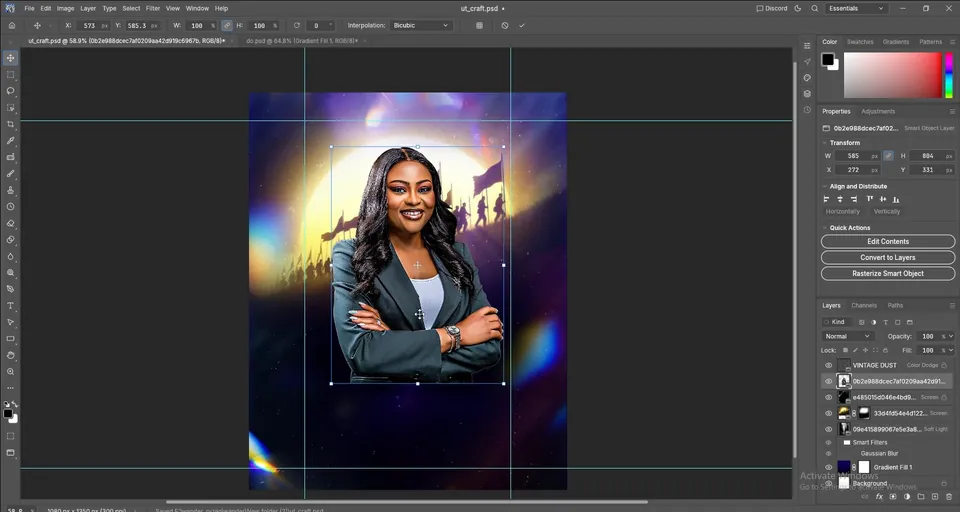
Drag in the guest photo (already cut out), make it smaller and place it in the upper half, between the guides. Press Enter to accept; you can come back and adjust it later.
Add a layer mask, take the soft round brush with black, set a low flow such as 4% to 10% and paint gently over the bottom of the photo. The arms and jacket fade into the dark background, which leaves room for the title.
Tip: Keep the flow low and build the fade up with several strokes. One stroke at high flow leaves a hard, obvious edge.
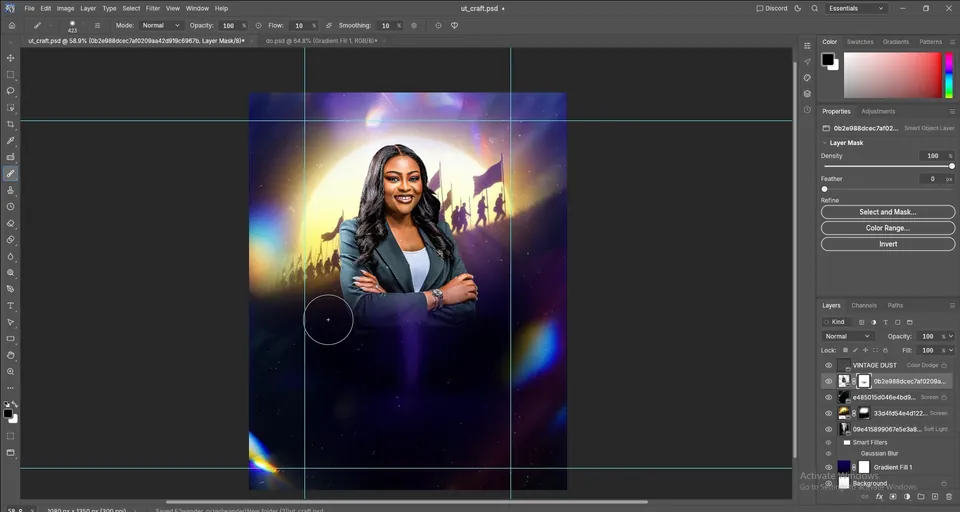
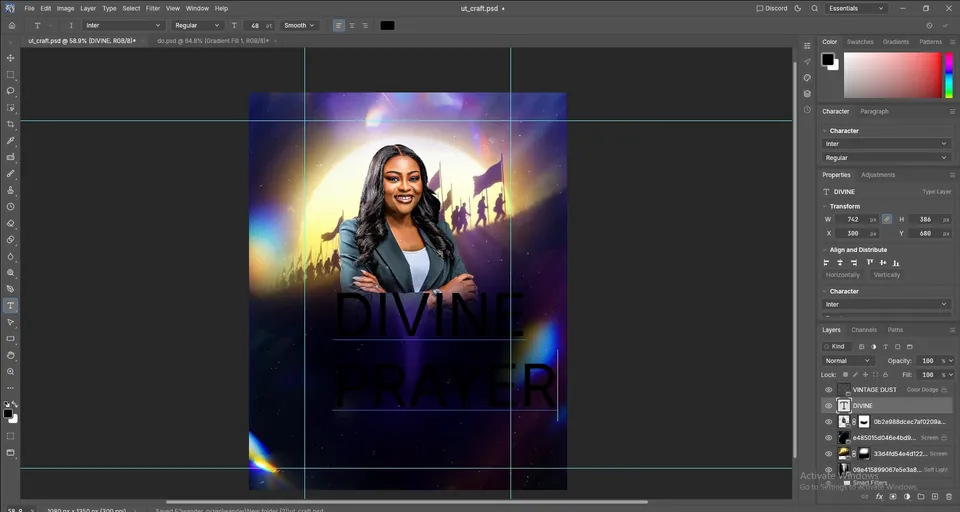
Pick the Type tool (T). You can click and type, or drag a box and type inside it. Type DIVINE, press Enter and type PRAYER.
Open the Character panel (Window › Character). Set the color to white and choose a high-contrast serif font; the video uses Editha. The leading is the icon with the letter A and a two-sided arrow. Use it to bring the two lines closer. Window › Paragraph opens the alignment options, and Ctrl+T lets you scale the text.
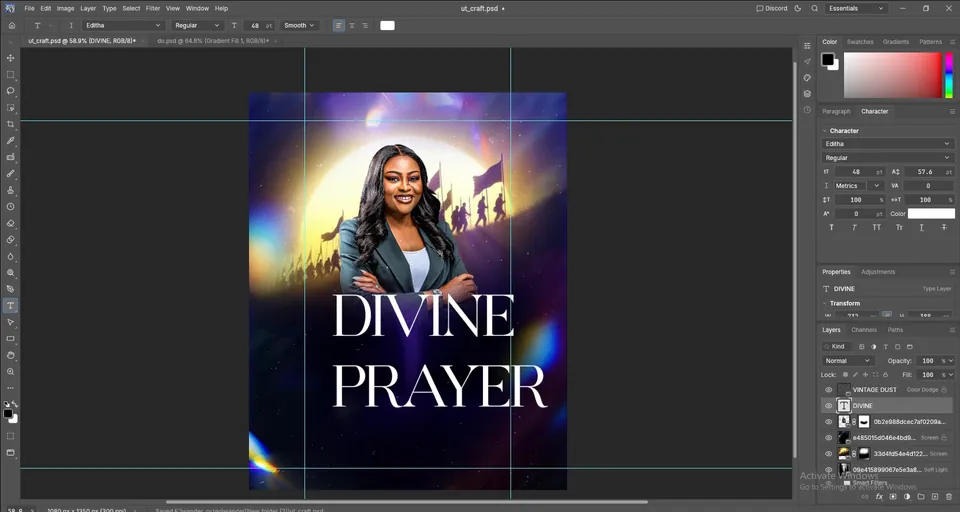
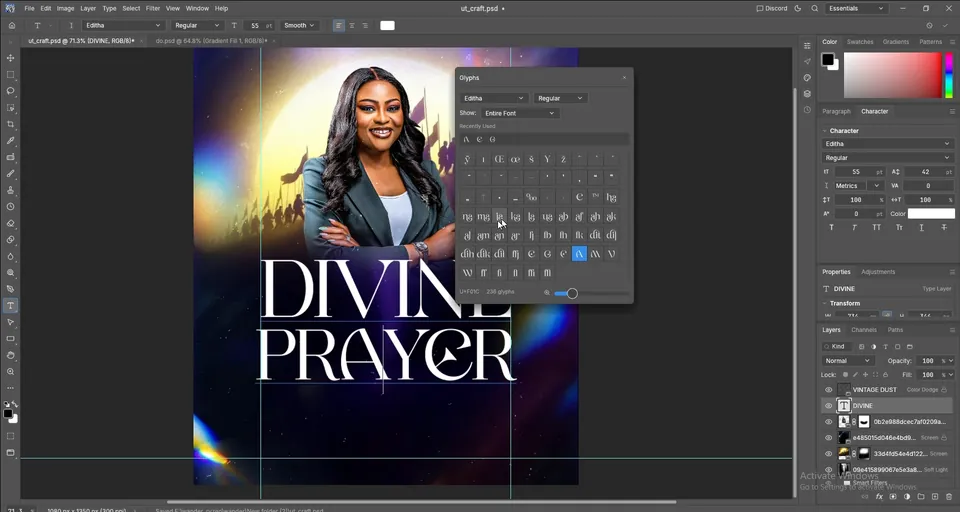
The Character panel has no switch for ligatures or alternate letters, so use Window › Glyphs instead. Make sure the Glyphs panel shows the same font, Editha, with Show: Entire Font.
Highlight a single letter with the Type tool, then double-click an alternate in the Glyphs panel to replace it. In the video the C-shaped E and the special A give the title its decorative look. Type in lowercase if you want to see which letters have alternates, then switch back to capitals.

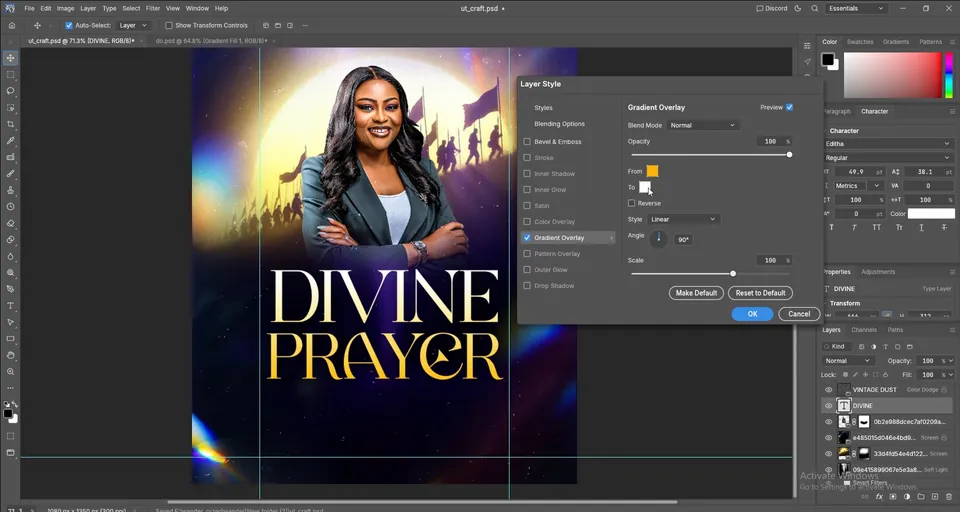
With the title selected, click fx at the bottom of the Layers panel. The Layer Style window has Bevel & Emboss, Stroke, Inner Shadow, Inner Glow, Satin, Color Overlay, Gradient Overlay, Pattern Overlay, Outer Glow and Drop Shadow.
Turn on Gradient Overlay. Set From to an amber yellow and To to white, keep the style Linear at 90° and click OK. The letters go from gold to white, like light shining on them.

Drag in the flame icon. It is black on a white background, so remove the white first. Right-click the layer and choose Rasterize Layer, then take the Magic Wand (it shares a group with Object Selection) and click the white area.
Press Delete to remove the white. If your selection grabbed the black flame instead, go to Select › Inverse and delete again. Press Ctrl+D to deselect, convert the layer back to a smart object, and use Ctrl+T to scale the flame and place it just above the title.
Finally, open fx › Color Overlay and pick a color. Red works, but a warm yellow matches the gold title better.


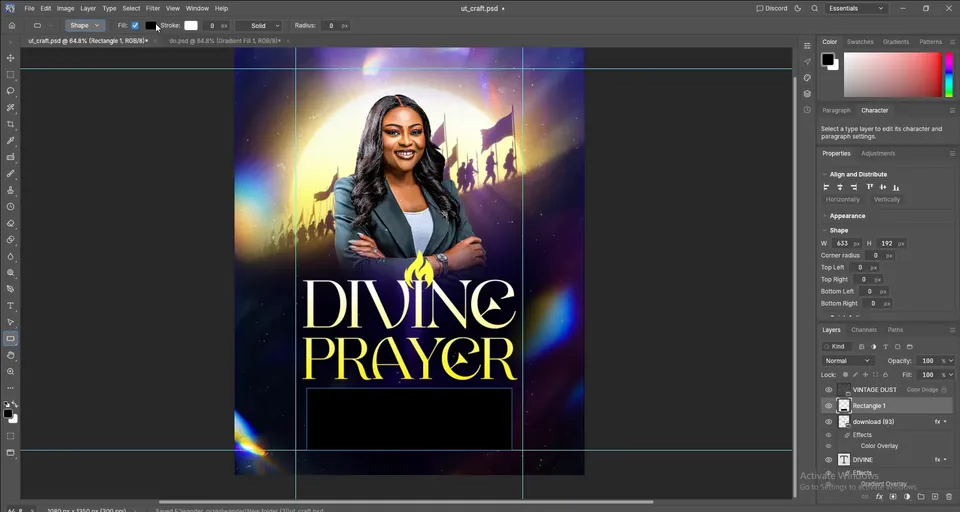
Pick the Rectangle tool (U) and draw a box at the bottom, between the guides. You might look for a gradient fill in the Properties panel, but at the moment PhotoCraft only offers solid colors there.
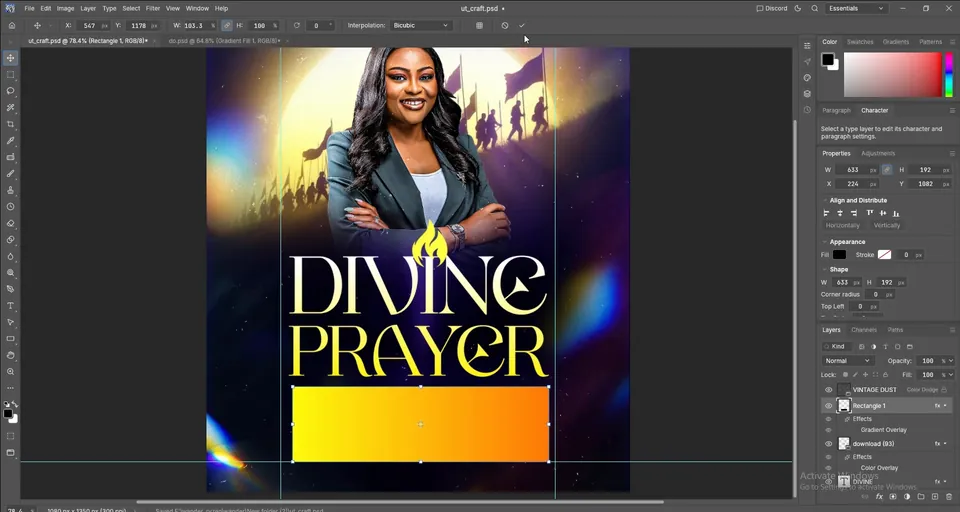
So use a layer style: click fx › Gradient Overlay, set From to yellow and To to orange, and adjust the angle until it looks right. This gives you the same result as a gradient fill.
Tip: Layer styles stay editable. Double-click the fx icon on the layer whenever you want to change the gradient colors.
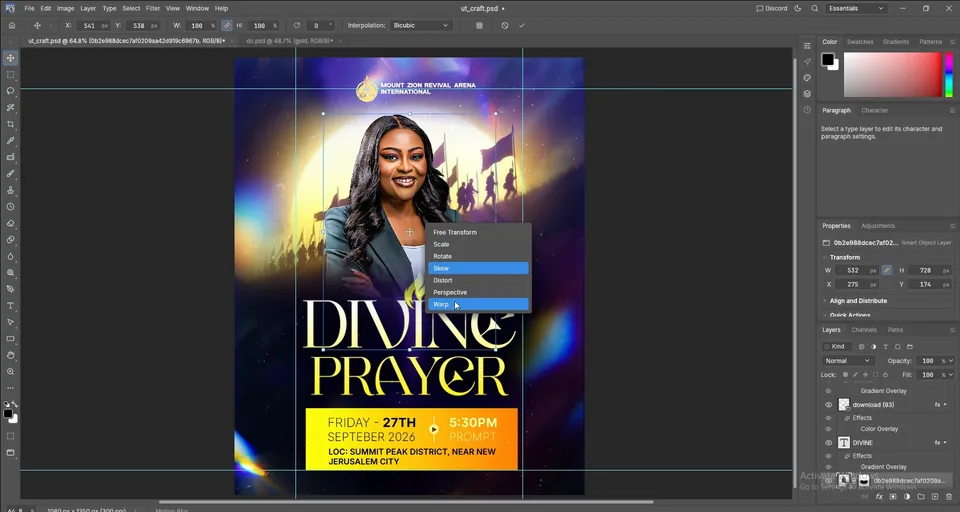
Add the event details on top of the box with the Type tool: the day and date, the time and the location. The video also adds the church name and logo at the top. These are only sample details, so style yours however you like.
One thing PhotoCraft is missing at the time of the video: with Ctrl+T, the right-click menu has Scale, Rotate, Skew, Distort, Perspective and Warp, but no Flip Horizontal. If you need to flip an image, flip it before you place it. Save your work, and leave a comment on the video if you want more PhotoCraft tutorials.

Key takeaways
- PhotoCraft works very much like Photoshop: the same tools, blend modes, layer masks, layer styles and shortcuts.
- Build a flyer from the back to the front: gradient, texture, glow, light effects, then the subject and the text.
- Screen hides black and Soft Light adds texture. Blend modes do most of the work when you combine photos.
- Use guides with a margin so the title and the details line up and stay off the edges.
- There is no gradient fill for shapes in Properties yet, so use the Gradient Overlay layer style instead.